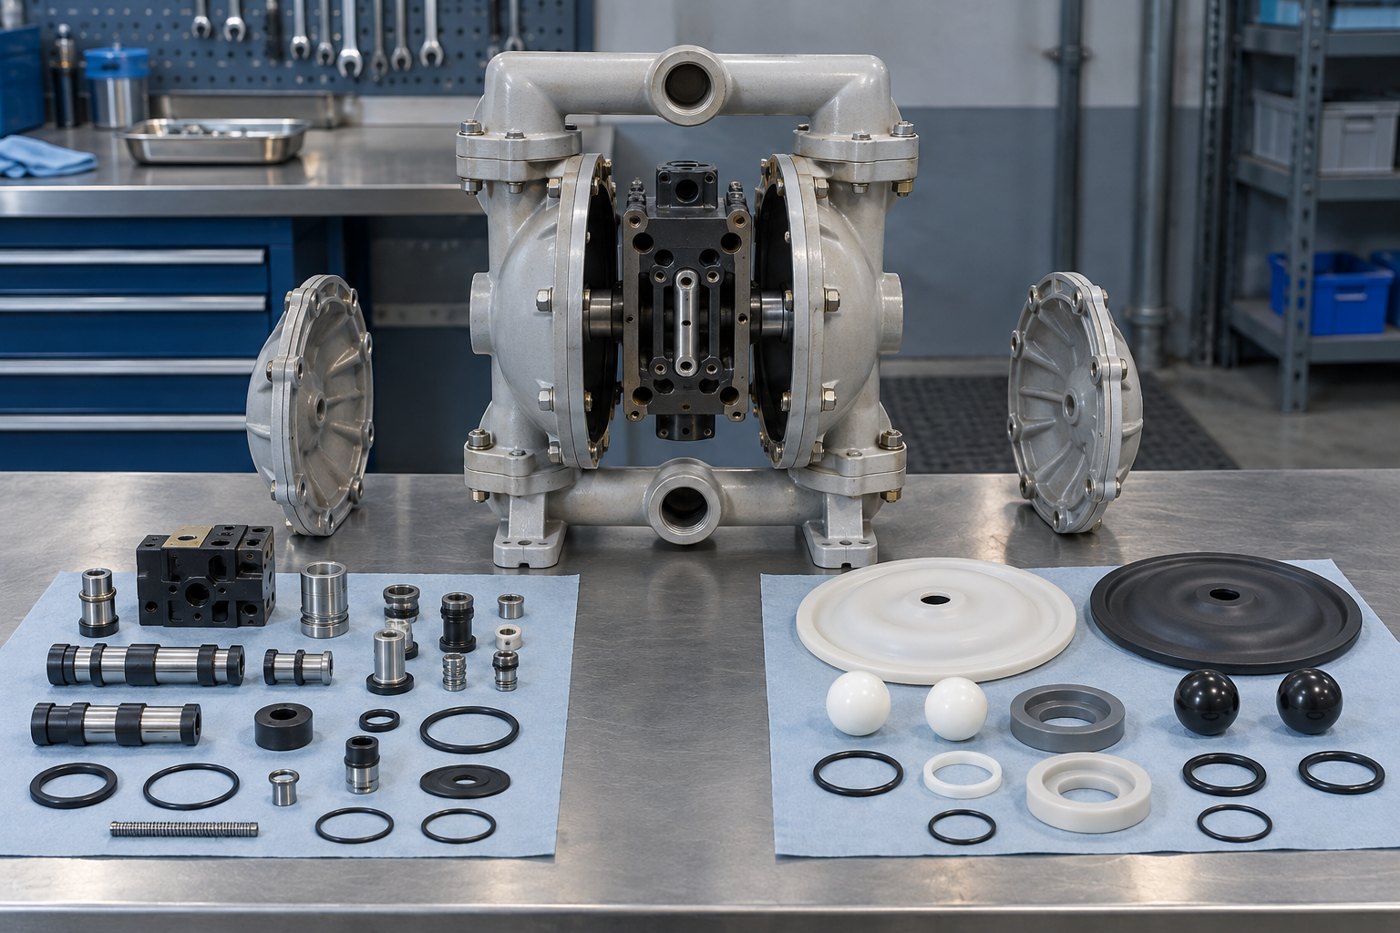
A WILDEN air kit repairs pneumatic-side components; a wet kit repairs fluid-side wear components. They solve different problems and cannot be selected reliably from pump size alone. Start with the complete pump item number and serial/nameplate information, then match the kit to the pump generation, air system and installed wetted materials.
Air kit and wet kit at a glance
| Kit type | Typical contents | Typical symptoms | Main selection data |
|---|---|---|---|
| Air kit | Air-valve and pilot components, seals, O-rings and related hardware | Air leakage, failure to shift, erratic or stalled cycling | Pump model, generation and air-system design |
| Wet kit | Diaphragms, balls, seats, fluid-side seals and gaskets as applicable | Liquid leakage, reduced suction, loss of flow or worn valves | Pump model plus diaphragm, ball and seat materials |
Kit contents vary by model and revision. Always verify the current bill of materials or manufacturer parts list before ordering.
What is a WILDEN air-side repair kit?
The air side controls the alternating movement of the diaphragms. An air kit typically services the main air valve, pilot system or related seals. It may be appropriate when the pump receives adequate air but will not shift, cycles irregularly, leaks air continuously or stalls at the end of a stroke.
These symptoms do not automatically prove that the air valve is defective. Restricted air supply, icing, a blocked muffler, incorrect assembly, liquid-side blockage or diaphragm damage can produce similar behavior. Diagnose the pump before replacing parts.
What is a WILDEN wet-side repair kit?
The wet side contacts the pumped fluid. A wet kit commonly includes diaphragms, valve balls, valve seats and fluid-side seals, depending on the exact pump. Material selection is essential because a kit that physically fits may still be chemically incompatible or unsuitable for abrasion, temperature or sanitation requirements.
Do not assume that the materials currently installed are correct for the process. If the service changed, review compatibility and operating conditions before repeating the old configuration.
How to identify the correct kit
- Record the complete item number. Photograph the entire nameplate so every letter, number and separator is legible.
- Confirm pump size and generation. Similar-looking pumps may use different air systems or internal dimensions.
- Identify all material codes. Confirm body, diaphragm, ball, seat and seal materials rather than stating only “rubber” or “plastic.”
- Describe the symptom. Note leakage location, air behavior, lost flow, noise and whether the pump can complete a stroke.
- Provide service data. Include fluid, concentration, temperature, viscosity, solids, pressure and cleaning method.
- Cross-check the current parts list. Superseded kit numbers and revisions should be verified before purchase.
Why a photo alone is not enough
External housings can remain similar while internal air systems, diaphragm styles and valve materials change. A cropped or worn label may also hide a critical character. Supply the full item number, overall pump photos, connection view and any readable component markings. Do not dismantle hazardous or contaminated equipment without following the site’s isolation and decontamination procedures.
Choose the kit from the failure mode
- Continuous air from the exhaust: inspect air-valve seals, pilot components, installation and air quality.
- Pump stalls or will not shift: check air volume and pressure, exhaust restriction, icing, pilot operation and liquid-side blockage.
- Liquid leaks from the center section: stop the pump and inspect diaphragms and containment immediately.
- Low flow or poor suction: inspect balls, seats, diaphragms, suction leaks, viscosity and piping restrictions.
A kit is not a substitute for root-cause analysis. Repeated failures may indicate excessive cycling, chemical attack, abrasion, poor air quality, piping stress or operation outside the recommended range.
Maintenance checklist before restart
- Isolate, depressurize, drain and decontaminate the pump.
- Follow the current service manual and specified tightening sequence.
- Keep air-side components clean and prevent lubricant or debris contamination.
- Replace paired wear parts when the manual requires it.
- Inspect shafts, chambers and manifolds for damage that a kit will not correct.
- Leak-test and function-test at controlled pressure before returning to service.
Frequently asked questions
Can I order a repair kit using only the pump series?
Usually not safely. The same series may have several sizes, generations, air systems and material combinations. Send the complete item number.
Does a wet kit include air-valve parts?
Normally no. Wet-side and air-side kits serve different assemblies, although exact contents vary. Check the current kit description.
Should I replace the air kit and wet kit together?
Not automatically. Inspect both sides, review service hours and failure symptoms, and follow the maintenance plan. Coordinated replacement may reduce planned downtime, but unnecessary parts should not be changed without reason.
How much does a WILDEN repair kit cost?
Cost depends on the exact pump, kit revision and materials. PTFE, specialty elastomers and large pump sizes can change the price significantly, so request a quotation using the complete item number.
Related DFIN resources
- Browse AODD repair kits and spare parts
- Troubleshoot low AODD pump flow
- Browse complete AODD pumps
- Send a nameplate and request kit matching
General maintenance guidance only. Use the current manufacturer service manual, parts list and site safety procedure for the exact pump.